
Below are the instructions for setting up access for new Users of your TTR system and for editing details associated with existing users.
IMPORTANT NOTE: When a User should no longer have access to your TTR system, follow the procedure for Inactivating Users.
To Add a New User
-
On the TTR Home screen under Administration at the bottom of the right-hand column, click Users, or click Administration on the horizontal navigation bar at the top of the Home screen and select Manage Users from the dropdown list.
-
When the Manage Users window appears, click the blue Add New User button at the upper right.
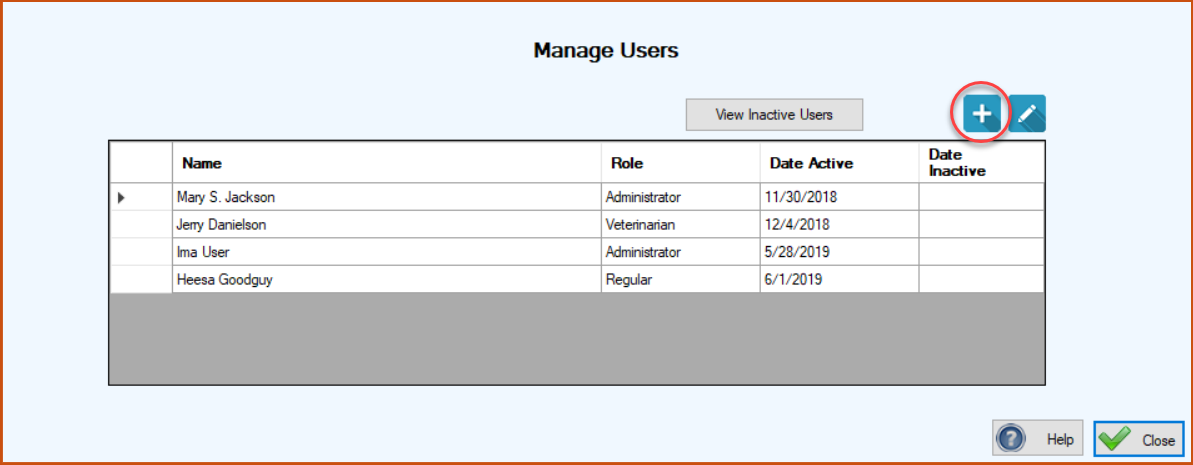
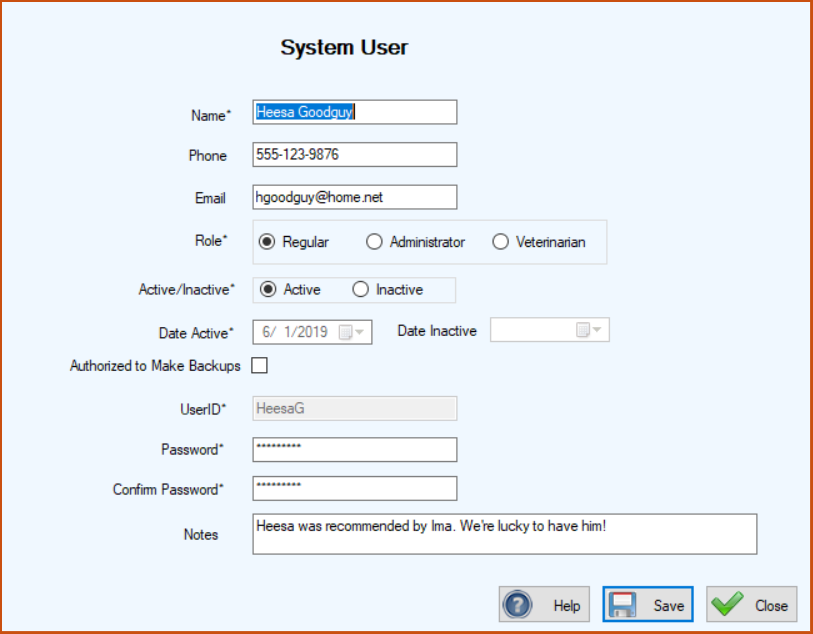
The System User window appears.
-
In the System User window, enter the basic User details:
Name (first and last)
Phone
Email -
Select the user’s Role. (Note: Regular and Veterinarian roles have fewer permissions than the Administrator role, which has full access to all system functions. For Regular and Veterinarian roles, inaccessible features and fields are disabled or “grayed out.”) .
-
Change the Date Active if you prefer a date different than today.
-
Select Authorized to Make Backups if appropriate.
(Note: Only trusted volunteers should be authorized to make backups of your database.
-
Enter a UserID and Password for the new user. Note: Once you assign and save a User ID, you cannot change it.
-
In the Notes field, type any helpful comments about the user.
-
Click the Save button at the lower right.
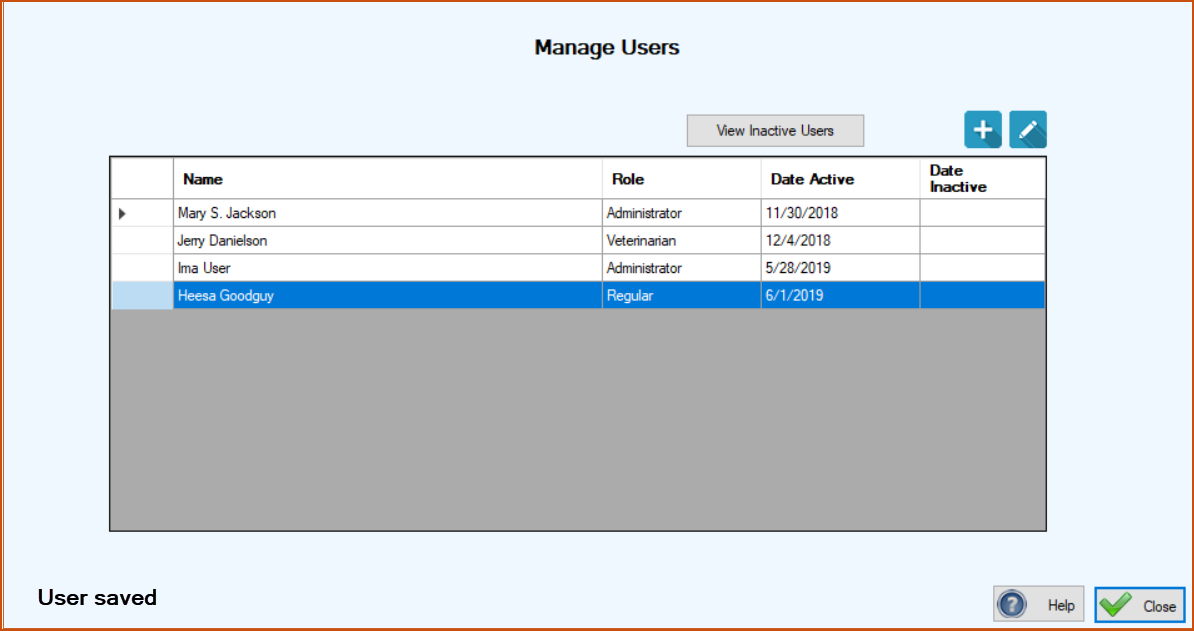
You are returned to the Manage Users window, where your new user now appears in the list, along with a “User saved” message at the lower left.
To Edit an Existing User
-
On the TTR Home screen under Administration, click Users (or select Manage Users from the Administration dropdown list at the top of the Home screen). The Manage Users screen appears, displaying a list of all existing users in the center grid.
-
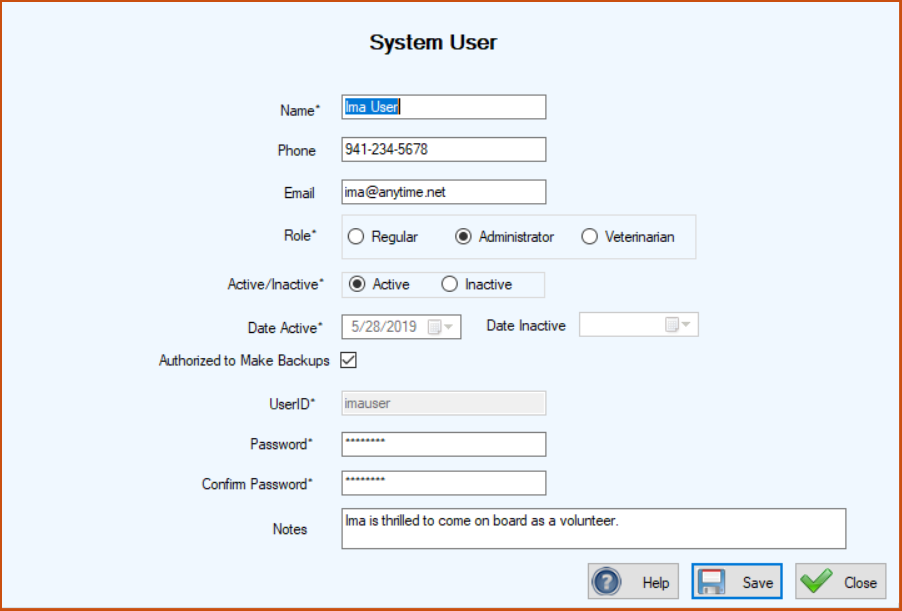
Select the user you want to edit by double-clicking the cell at the farthest left on the row containing the user’s name. The System User screen appears with all fields ready for editing.
-
Make the desired changes, e.g., change in role or authority to make backups. Note: For data integrity and security reasons, you cannot change the UserID.
-
Click Save. You are returned to the Manage Users screen where you will see a “User modified” confirmation message at the lower left. (Note: If you changed the user’s role, the new role will appear in the “Role” column in the grid.)