
Adding a Donation from the TTR Home Screen
1.On the TTR Home screen under Modules, click the Donations button. The Manage Donations screen appears, displaying a list of all active PCO records in the center grid and input fields below the grid, ready for your entries.
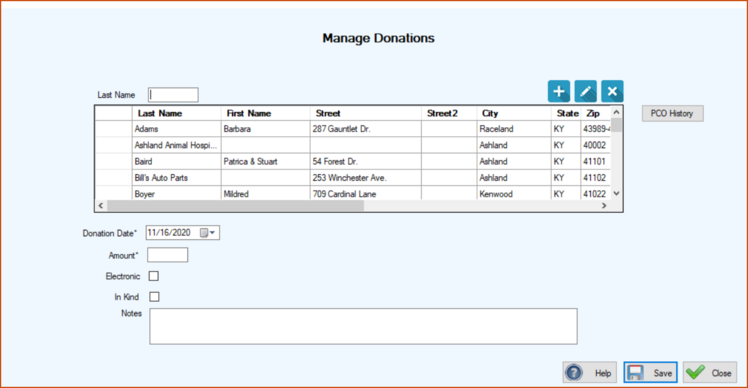
2. Begin typing the letters of the last name of the donor into the Last Name field above the center grid until the row containing the donor’s information appears highlighted.
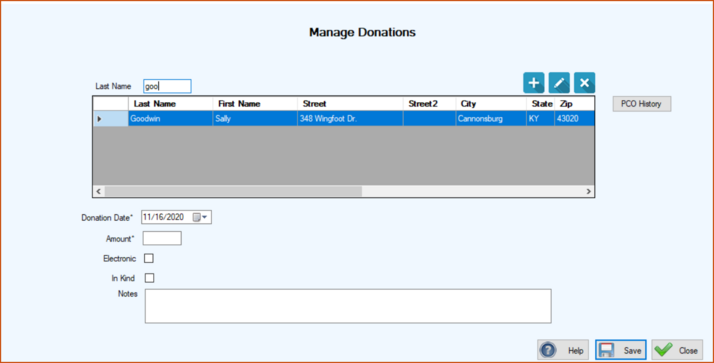
3.Below the center grid, type or select the Donation Date.
4.Enter the monetary amount of the donation. (Note: If this is an “In Kind” donation, enter the market value of the donated goods or services.)
5.If the donation was made electronically (online), click to select the “Electronic” checkbox.
6.If the donation was goods or services rather than actual money, click the “In Kind” checkbox.
7.Type any important details in the Notes field. For example, for an “In Kind” donation, enter the description of the donated goods or services and the purpose for which they were, or will be, used; and for a monetary donation made electronically, you might want to indicate the source, such as PayPal or Facebook.
8.Click Save. You are returned to the Manage Donations screen where the row containing the donor’s information is still highlighted in the center grid and a confirmation message appears in the lower left corner of the screen.
