
Adding PCO Membership Information from the Manage People, Companies, and Organizations Screen
1.On the TTR Home screen, click the People, Companies, Organizations button. The Manage People, Companies, and Organizations screen opens, displaying a list of all active PCO records in the system.
2.To select the PCO who wants membership, use one of these methods:
OR
– In the Show field to the left of the center grid, select People or Companies and Organizations, and then in the Last Name field above the center grid, begin typing the letters of the PCO’s last name or organization name until the only item appearing in the center grid is the desired PCO, indicating it is selected because the row is highlighted and has an arrow in the leftmost cell.
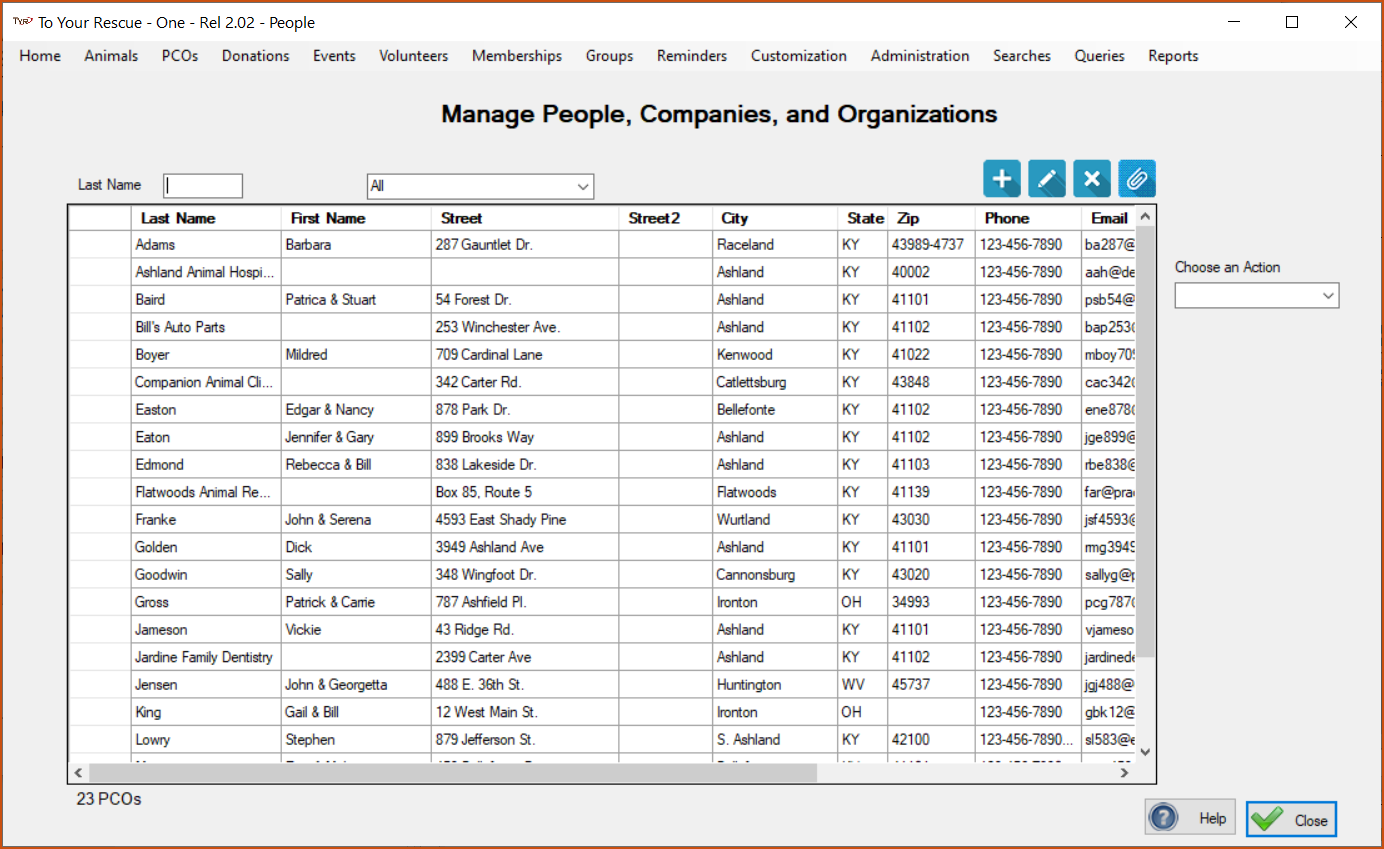
3.After selecting the PCO click the Membership selection in the drop down list under Choose an Action. The PCO Memberships screen opens. If the PCO has not yet become a member, the center grid area will be blank.
Note: If the center grid already shows a membership entry for the PCO, proceed to the instructions for Editing PCO Membership Information.
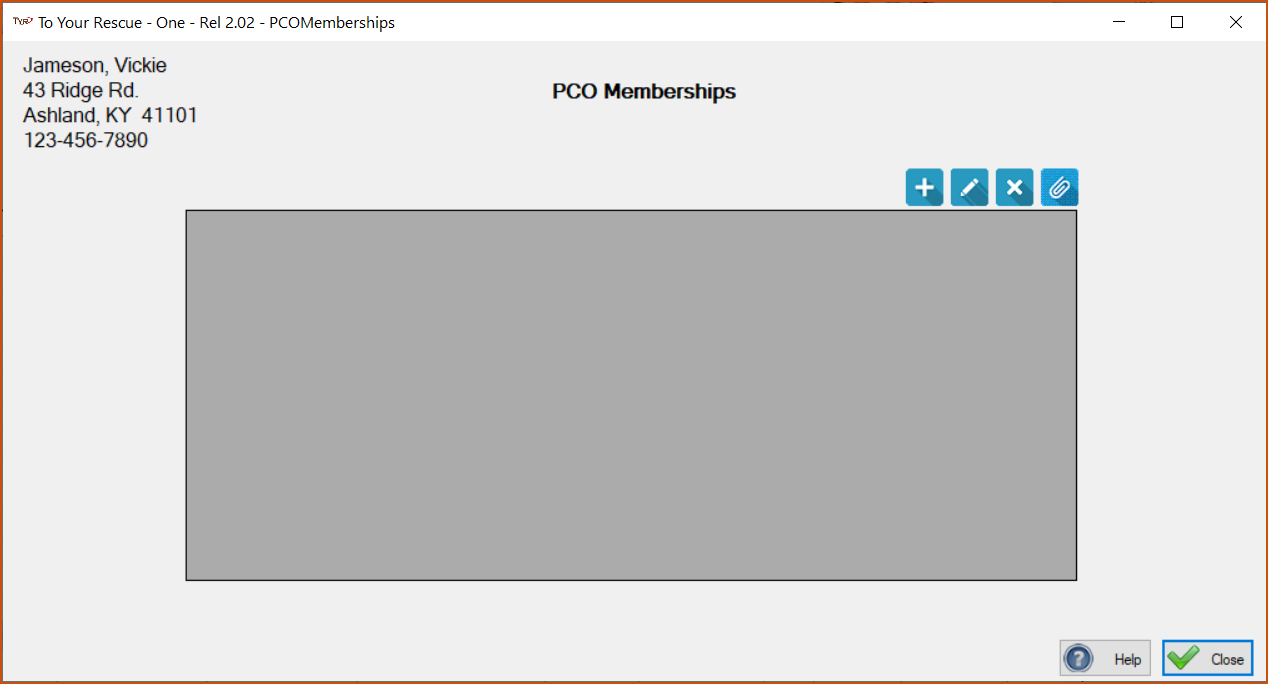
 ) to launch the Membership screen.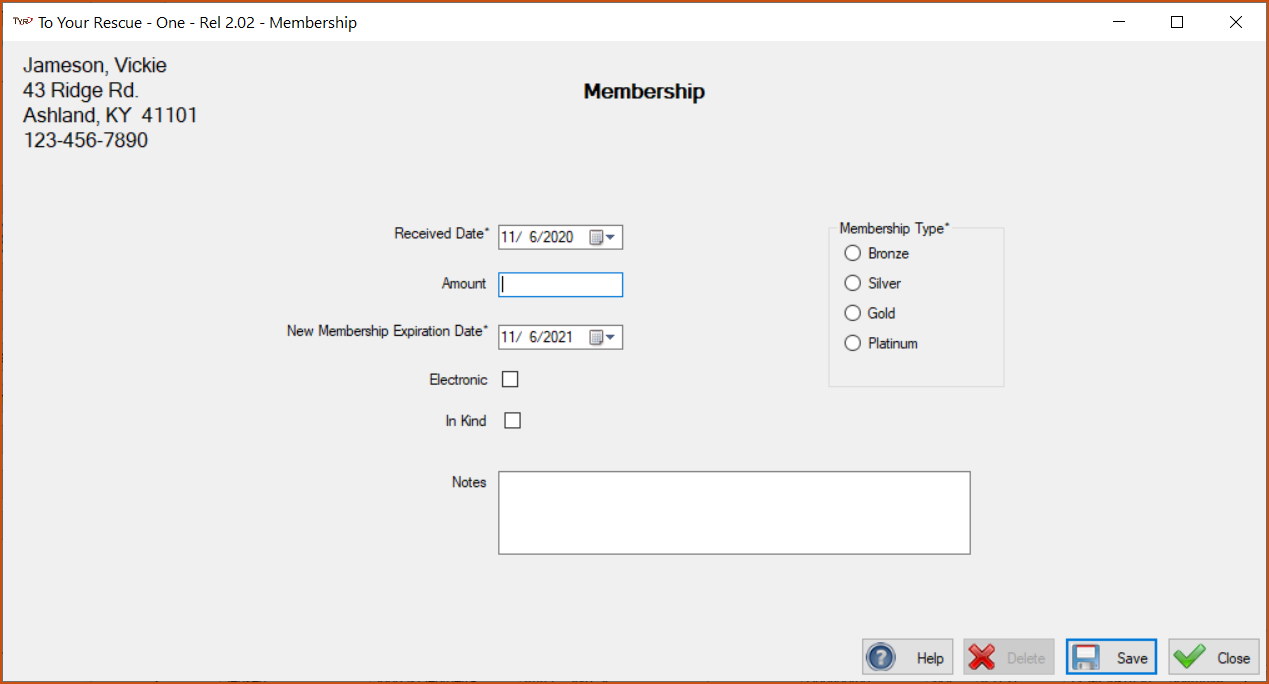
5.In the Membership Type field at the right side of the screen, click the type of membership to which the PCO has committed. (Note: Click here for instructions on setting up Membership Types.)
6.In the Received Date field, enter the date the membership fee was paid by the new member.
7.In Amount field, enter the amount paid for membership, following the rules for entering monetary amounts. (Note: If the membership fee was paid with an In Kind donation, enter the market value of the goods or services donated.)
8.In the New Member Expiration Date field, enter the date the membership is due for renewal.
9.Select the Electronic checkbox if the payment was made electronically, e.g., via PayPal.
10.Select the In Kind checkbox if the membership fee was paid with an In Kind donation. (See Note in Step 6.)
11.In the optional Notes field, enter any helpful information.
12.Click Save. You are returned to the PCO Memberships screen where the new membership information appears in the center grid, along with a confirmation message in the lower left corner.
Editing PCO Membership Information
-
Follow Steps 1 through 3 above for Adding PCO Membership Information to reach the PCO Memberships screen, and then proceed to Step 2 below.
-
In the center grid, double-click the leftmost cell on the row containing the Membership information. The Membership screen opens, ready for editing.
-
Enter your desired changes and click Save. You are returned to the PCO Memberships screen where your changes appear in the center grid, along with a confirmation message in the lower left corner.
Deleting PCO Membership Information
-
Follow Steps 1 through 3 above for Adding PCO Membership Information to reach the PCO Memberships screen, and then proceed to Step 2 below.
-
In the center grid, click the leftmost cell on the row containing the membership information to select it.
-
Click the Delete button. A confirmation window similar to this will appear:
-
To complete the deletion, click OK. You are returned to the Manage People, Companies, and Organizations screen where a “Membership Deleted” confirmation message appears in the lower left corner.