
Important Notes:
-
Your database file containing all the information you add and save while using the TTR application resides on your computer’s Windows (C:) drive in a folder named TTRDB.
The database file name is tyr.db, and the file path is C:\TTRDB\tyr.db. The file location looks similar to this in in your Windows File Explorer:

-
To protect against the loss of your valuable data, we strongly recommend backing up your database at the end of each day you use TTR.
-
Choose an external location that will always be secure, indestructible, and readily accessible by yourself and at least one other trusted person.
REMEMBER: Restoring the TTR application and your database to a new or repaired computer is easy if you always have an accessible backup copy of your latest database stored in an external location. TTR personnel can provide you a link and instructions to download and install the application, but you will not be able to restore your database unless you have a current copy of it. That’s why it’s important to back up your database often to a location outside of your computer. As soon as you have reinstalled the TTR application on your new or repaired computer, you can simply follow the instructions for Restoring Your Database to quickly get back to business with all your data intact.
Here are several options to consider for storage locations, all of which can be accessed through Windows Explorer:
|
Storage Device or Location
|
Description
|
Pros and Cons
|
|
Microsoft OneDrive
|
Microsoft’s Internet-based storage platform; up to 5GB of storage space free to everyone with a Microsoft account (also free); greater storage capacity for Microsoft 365 subscribers; files are stored on Microsoft’s server, like a “hard drive in the cloud”; use a web browser or Windows File Explorer to access the files stored in your OneDrive space; files can be shared with others
|
Outstanding security and backup features on Microsoft’s servers; files can be uploaded directly from Windows Explorer; free account offers less storage space than Google Drive but more than enough to store several TTR database backups
|
|
Google Drive
|
Google’s Internet-based storage platform; up to 15GB of storage space free to everyone with a Google account (also free); files are stored on Google’s server; use a web browser to access stored files (Google Chrome is best because of available add-ins); to be accessed through Windows Explorer, requires free Backup and Sync application installed on computer to add drive into Windows Explorer folder structure
|
Outstanding security and backup features for data stored on Google’s servers
|
|
Dropbox
|
Internet-based file storage and sharing platform that can be accessed from multiple devices, including through Windows Explorer on Windows computers when the free DropBox Desktop app is installed; free basic plan provides 2GB of storage space
|
Powerful security features; not as much free storage space as Microsoft and Google
|
|
DVD or CD
|
Inexpensive way to protect your data as long as you protect them from scratches and direct sunlight
|
Portable, but not indestructible; recommend 2 copies for redundancy
|
|
USB drive
(aka “flash” or “thumb” drive) |
Flash memory with an integrated USB interface; typically removable, rewritable, and much smaller and faster than CDs or DVDs. Also available with much larger storage capacity than CDs and DVDs.
|
Portable, but not indestructible; recommend 2 copies for redundancy
|
|
External hard drive
|
Can be attached to a computer through a USB, FireWire, or wireless connection; typically has high storage capacity and often used to back up a computer or serve as a network drive
|
Less destructible than CD, DVD, and USB drives; recommend also backing up to a second device like CD or flash drive for redundancy
|
Follow these steps to perform a backup:
1.On the TTR Home screen under Administration, click the Backups button, OR select Manage Backups from the Administration list on the horizontal navigation bar at the top of the screen.
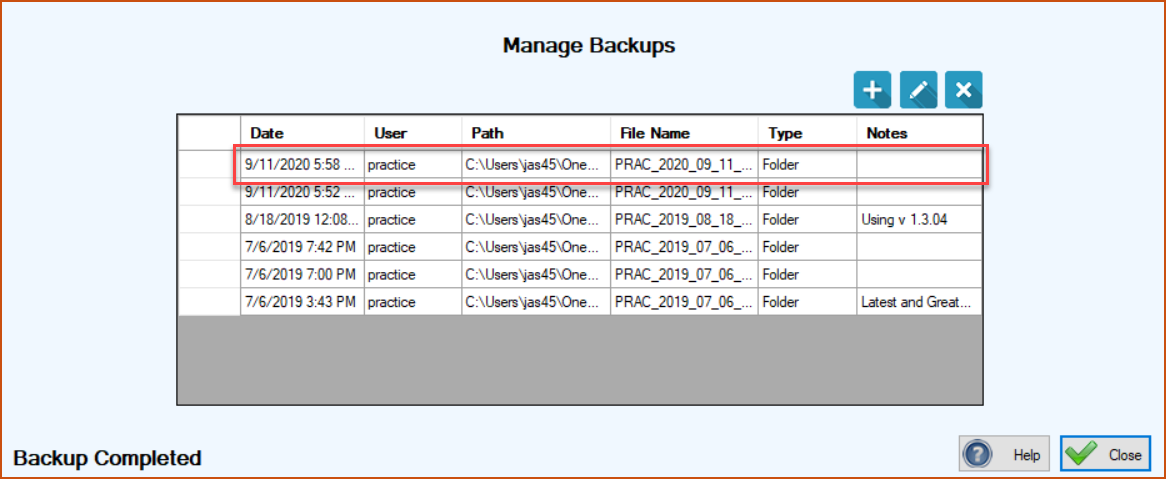
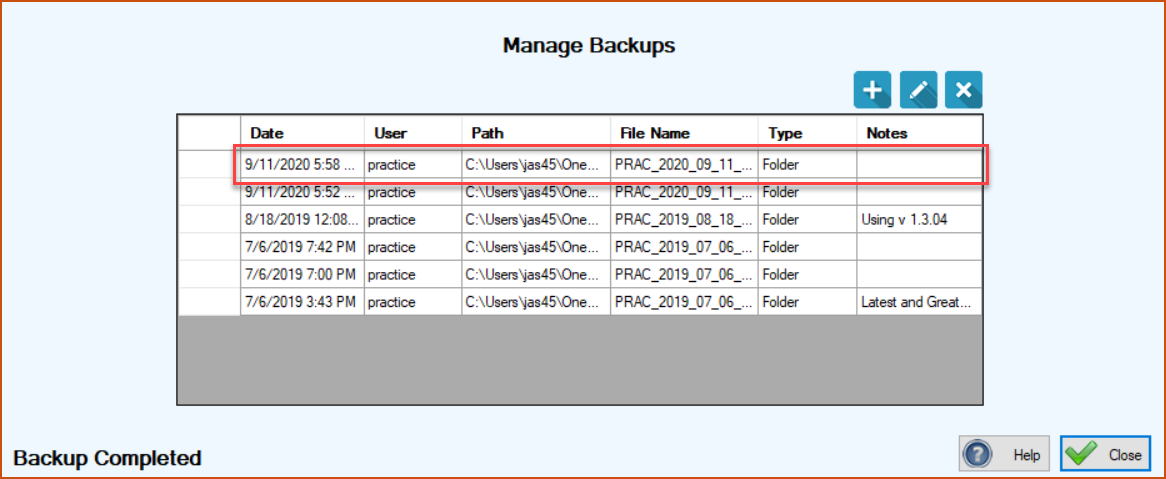
The Manage Backups screen opens, showing a list of previous backups you have done.
Click the Add New Backup ( ) button. The Make a Backup screen appears. If you have made at least one previous backup, the location of your last backup appears near the top of the screen.
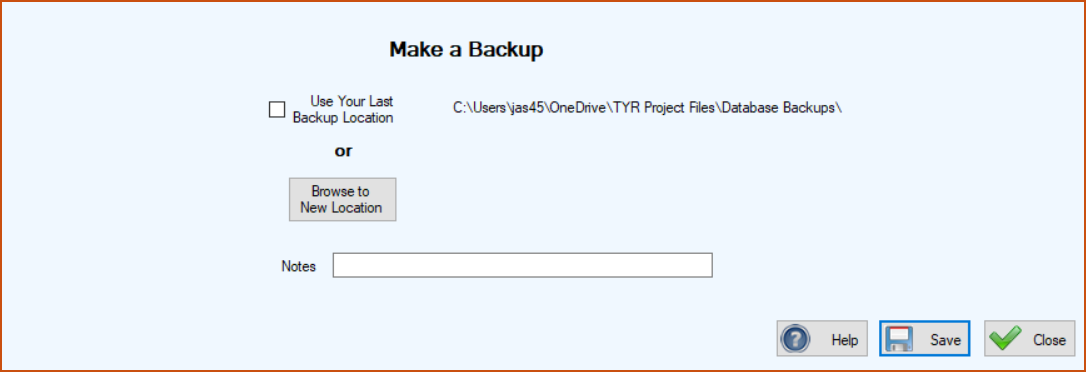
2.Decide on a location and perform the backup. You have two choices:
-
(A) LAST BACKUP LOCATION:
-
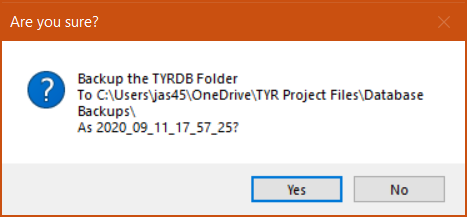
Click the “Use Your Last Backup Location” checkbox and then click Save. A confirmation popup window will appear showing the file path:
-
Click “Yes” to complete the backup. You will be returned to the Manage Backups screen where details of this backup will appear at the top of the center grid, along with a “Backup Completed” confirmation message in the lower left corner of the screen.
-
(B) NEW LOCATION:
-
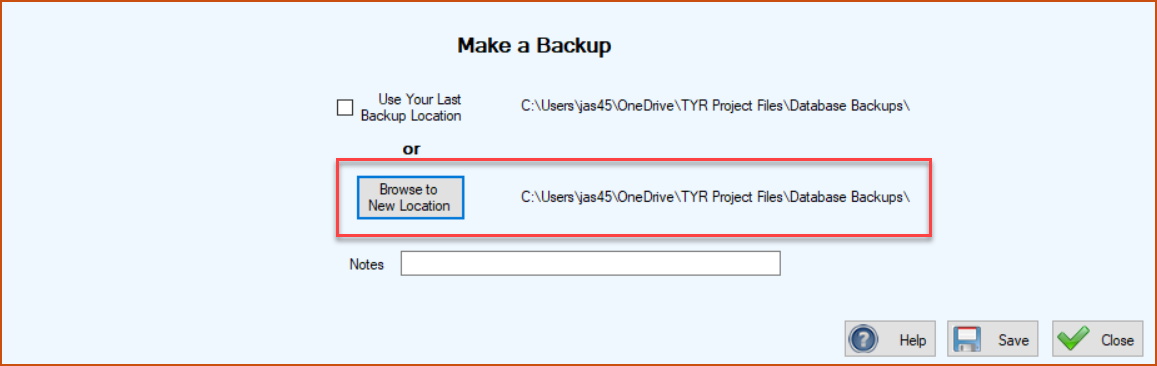
Click the “Browse to New Location” button on the Make a Backup screen.
-
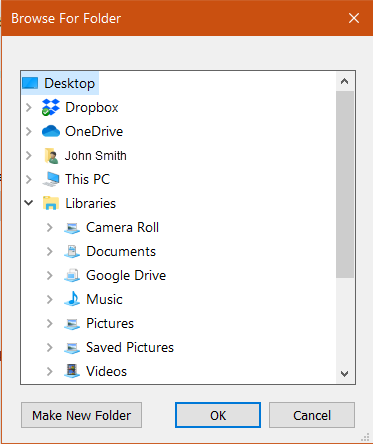
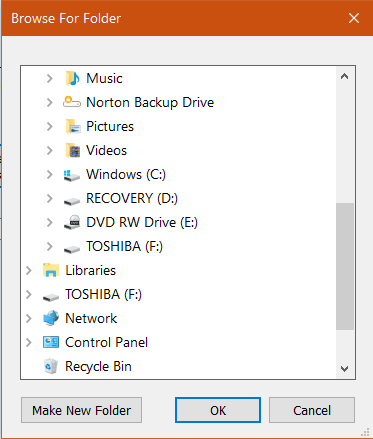
In the ‘Browse For Folder” window that pops up showing your Windows folder structure, find and select the folder where you want to store the backup.
 |
 |
-
After you select the storage location, click OK. You are returned to the Make a Backup screen where you can see your selected file path for the backup.
-
Click Save. When you see the same type of confirmation popup as for the LAST BACKUP LOCATION above, click “Yes” to complete the backup. The Make a Backup screen closes, returning you to the Manage Backups screen where your new backup appears at the top of the center grid along with a “Backup Completed” confirmation message in the lower left corner of the screen.
 IMPORTANT NOTE: No matter which backup location option you choose, the automated backup program will create a new folder at that location with today’s date and the time of the backup (uses a 24-hour time stamp, e.g., 19_42_27 is 7:42:27 PM). The backed up database file is stored inside that folder.