
-
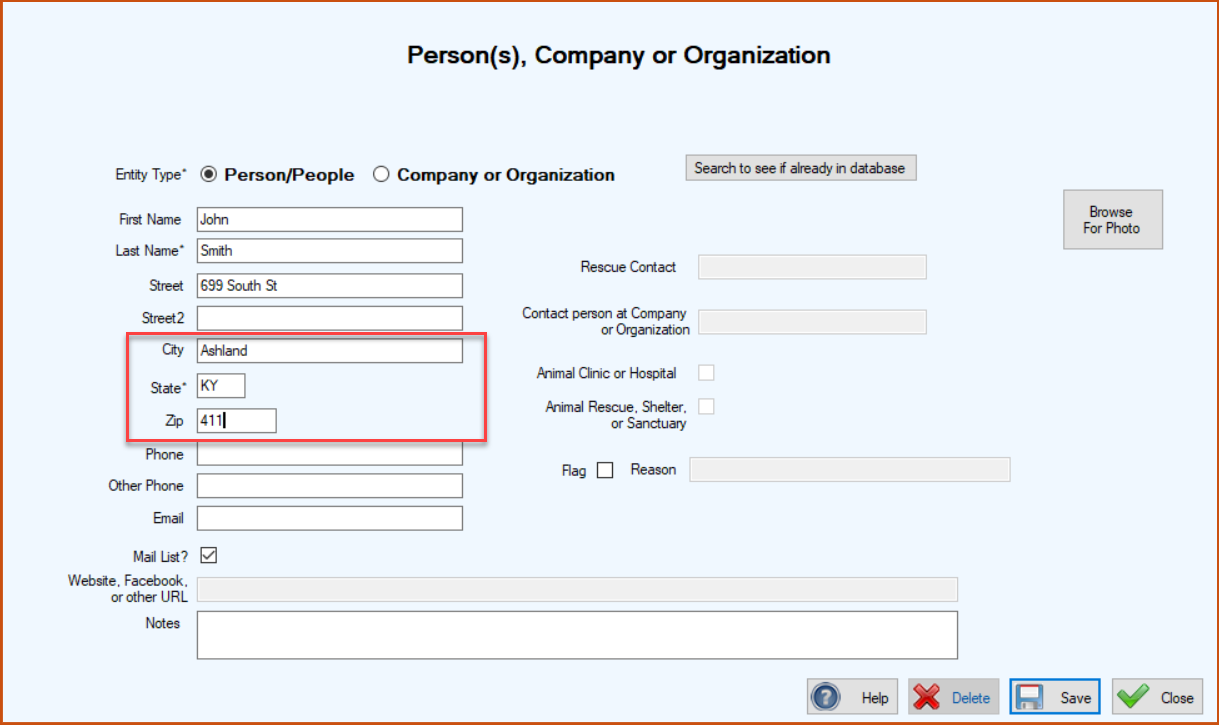
It’s optional but certainly very helpful to include at least a partial zip code when a lot of your supporters and associates are located in the same area.
-
In the City field, you must type the exact characters included in the established abbreviation. The first character can be upper or lower case, and the rest of the characters must match the case in the established abbreviation.
To Add an Auto Completes – Cities Item
1. On the TTR Home screen, select Auto Completes – Cities under Customization.
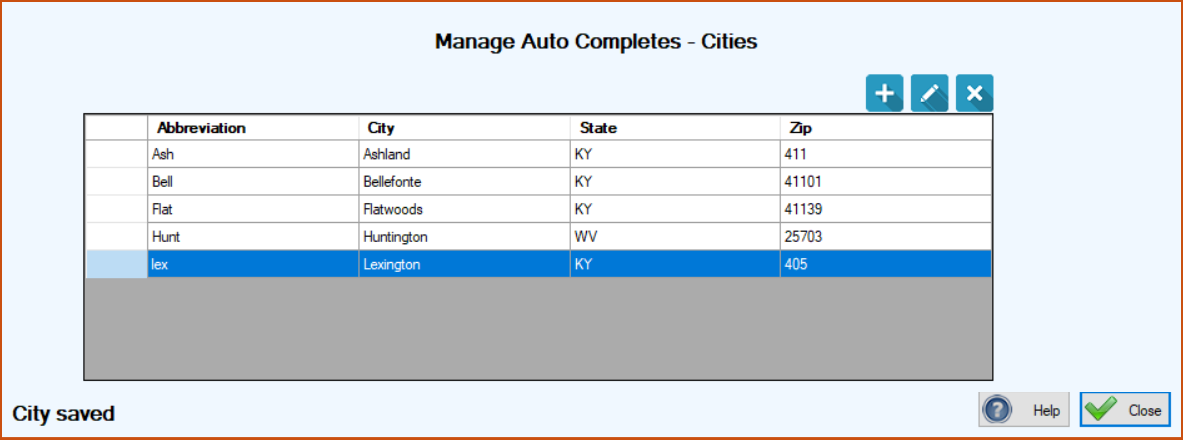
The Manage Auto Completes – Cities screen opens. If you already have Auto Completes set up, they will appear in the center grid. (Note: Until you have memorized all the abbreviations you set up, you can always view this grid for assistance.)
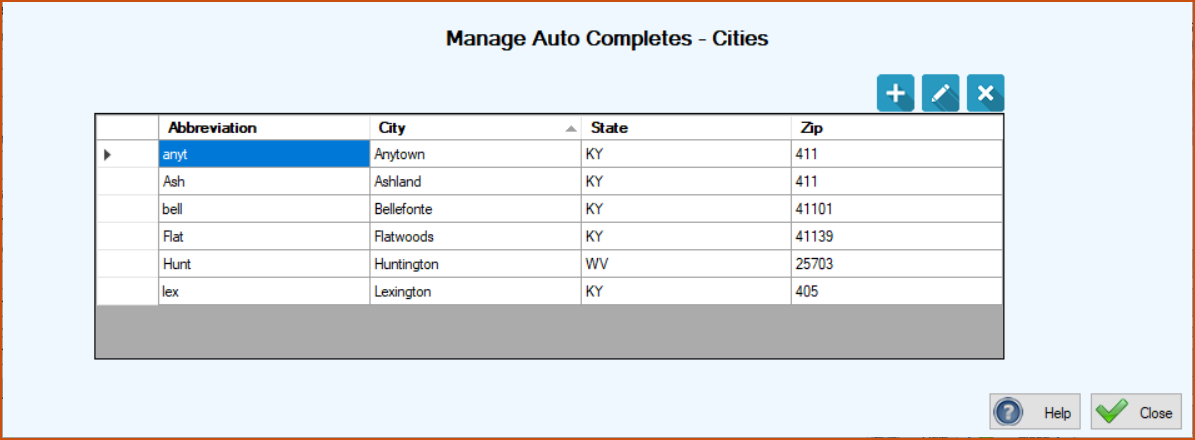
Here’s an explanation of the column contents:
|
Column Heading
|
Contents
|
|
Abbreviation
|
The exact characters you must type in the City field on any TTR screen where you want the auto completion feature to fill in the information; first letter can be upper or lower case, and remaining letters must be the same case in the City field as in the Abbreviation
|
|
City
|
Full name of the city as it will appear in the City field as soon as you enter the correct City Abbreviation. The first letter should always be upper case (capitalized).
|
|
State
|
State code that will appear automatically in the State field as soon as you enter the correct City Abbreviation
|
|
Zip
|
The portion of the zip code that will appear automatically in the Zip field as soon as you enter the correct City Abbreviation
|
2. Click the blue Add button ( ). The Auto Complete – City screen appears.
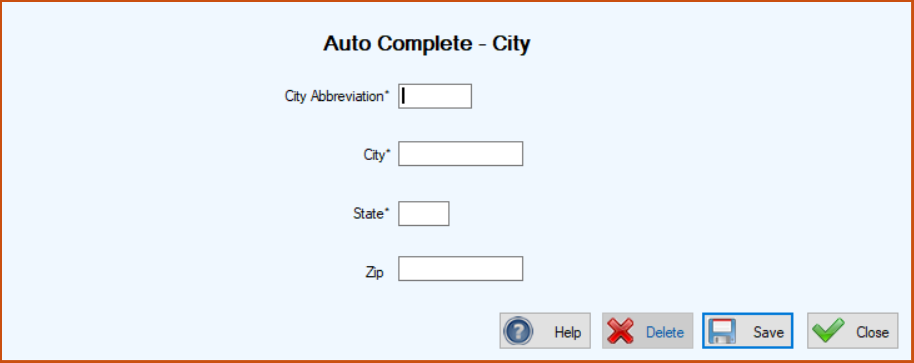
3.In the City Abbreviation field, enter a simple abbreviation for the city name, e.g,. Lex for Lexington.
Notes:
(a) Although your abbreviation can contain up to 10 characters, we recommend limiting it to three or four characters so it will be easy to recall because in the City field on screens where this feature applies, you must enter the complete abbreviation for the auto completion to work.
(b) You can use upper or lower case for the City Abbreviation on this screen but REMEMBER, you must match the case of all but the first character when you type the abbreviation in the City field when setting up a new PCO or Event record.
4.In the State field, type the two-character standard U.S. state abbreviation in upper case letters, e.g., KY for Kentucky.
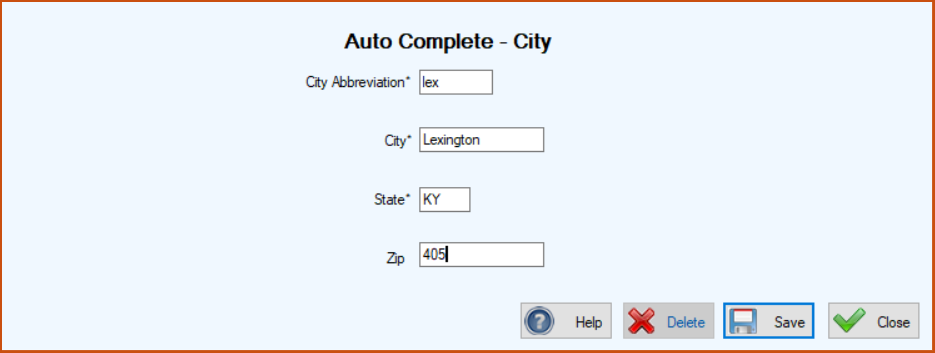
I5.n the Zip field, you can leave it blank or you can type up to 12 characters, so you can include at least the first part of a zip code to reduce keystrokes later, e.g., all Lexington’s zip codes start with 405, so you can enter only those three characters in the Zip field.
When you have completed Steps 3 through 5, your screen should look similar to this:
6.Click Save. The Auto Complete – City screen closes and you are returned to the Manage Auto Completes – Cities screen where your new entry appears in the grid, along with a confirmation message at the lower left of the screen.
To Edit an Auto Completes – Cities Item
1.On the TTR Home screen, select Auto Completes – Cities under Customization to access the Manage Auto Completes – Cities screen.
2.Double-click the cell at the farthest left on the row containing the item you want to edit. The Auto Complete – City screen appears with the details of the selected item ready for editing.
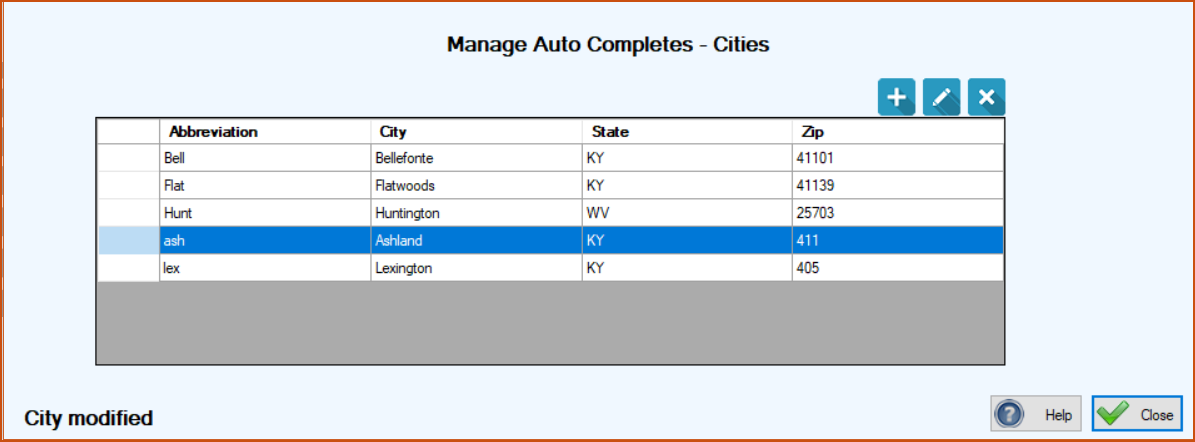
3.Make your desired change(s) and click Save. The Auto Complete – City screen closes and you are returned to the Manage Auto Completes – Cities screen where your change appears in the grid, along with a confirmation message at the lower left of the screen.
To Delete an Auto Completes – Cities Item
1.On the TTR Home screen, select Auto Completes – Cities under Customization to access the Manage Auto Completes – Cities screen.
2.Select the row containing the item you want to delete by clicking the cell at the farthest left in the row.
3.Click the Delete button ( ). A popup window appears to confirm you really want to delete the item.
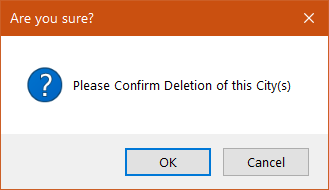
4.To complete the deletion, click OK. The popup closes and on the Manage Auto Completes – Cities screen, the deleted item disappears from the center grid and a confirmation message appears in the lower left corner.