
-
One record at a time for individual animals
-
Multiple records all at once for a group of animals such as a litter of kittens or a flock of birds
To Add a Single Record for One Animal at a Time or Multiple Records for a Group of Animals
1. On the TTR Home screen under Modules, click Animals. The Manage Animals screen opens.
2. Click the Add New Animal button ( ) at the upper right. The New Animal screen opens.
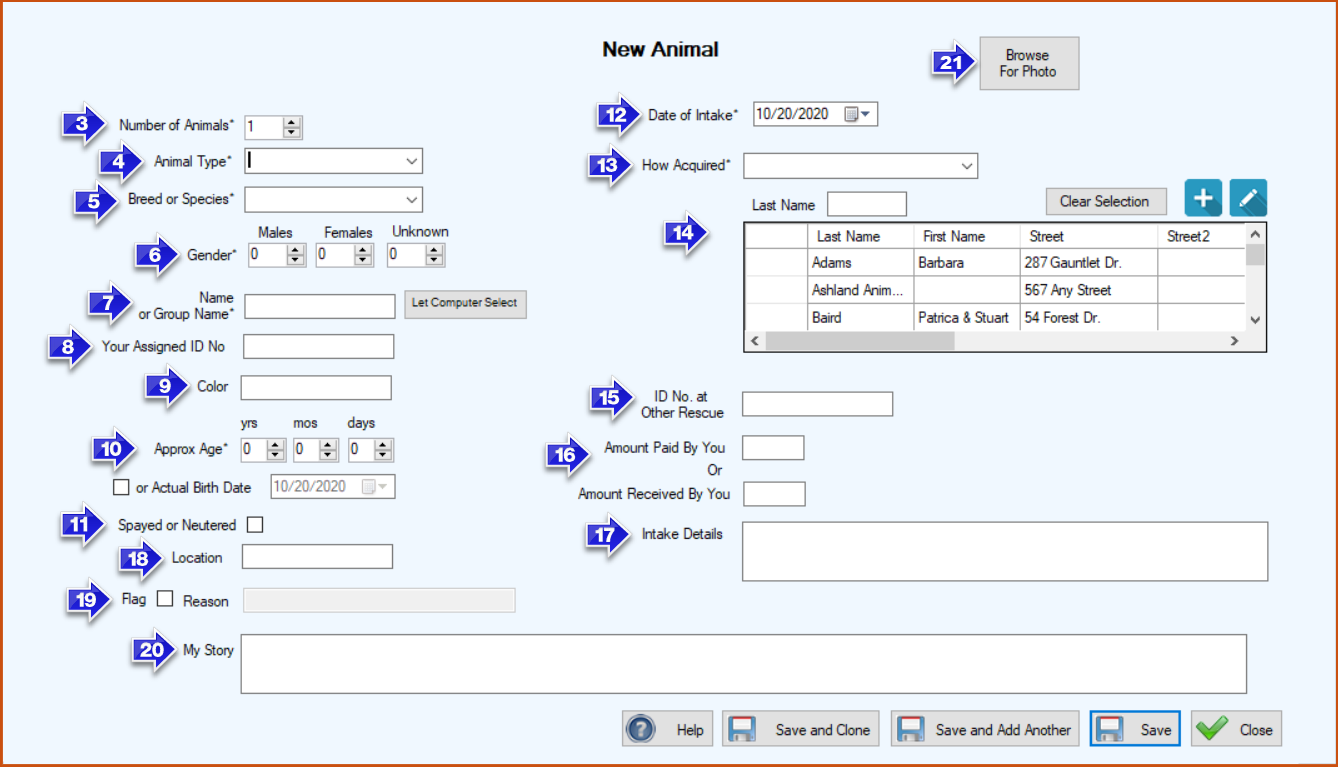
4.Animal Type: Select the Animal Type from the dropdown list.
(Note: The selections in the dropdown list come from the Animal Types you set up when you customized your system. If the Animal Type you need is not in the list, add it to your dropdown list by following the procedure for
Creating & Managing Animal Types. If you use your keyboard to type in a Type, you will receive an error message when you try to save the record reminding you to select from the established list.)
5.Breed or Species: Select the Breed or Species from the dropdown list. This list becomes available only after you select an Animal Type in Step 4.
(Note: The selections in the dropdown list come from the Animal Species you set up when you customized your system. If the Animal Species you need is not in the list, add it to your dropdown list by following the procedure for Creating & Managing Animal Species. Like Animal Type, the system won’t accept an entry typed into this field. You must select from the established list.)
6.Gender: Enter the Number of Animals of each Gender (Males, Females, and/or Unknown).
(Note: For a single animal, the entry will typically be Males 1 or Females 1. For a group of animals, you might need to make entries in all three fields.)
7.Name or Group Name:
8.Your Assigned ID No (optional): Enter the animal’s ID number in the Your Assigned ID No field only if you already have an animal numbering system that you want to retain. With TTR, there is no longer any need to keep a separate ID list because TTR automatically assigns a unique ID number to every animal when you create the records.
9.Color (optional): Enter the Color of the animal if you want it to appear on animal reports.
10.Approx Age or Actual Birth Date: Select or type a number in the “yrs“, “mos“, and “days” fields for the Approx Age (approximate age) if you don’t know the animal’s actual birthdate. If you know the actual date of birth of the animal, select the “or Actual Birth Date” checkbox and type in, or use the date picker to select, the date.
11.Spayed or Neutered: Select this checkbox if you are certain the animal has been spayed or neutered.
12.Date of Intake: Select or type in the date you acquired the animal if different than today’s date. (The system always shows the current date when you open the screen.)
13.How Acquired: Select from the drop-down list you created when you were setting up Animal Acquisition Ways in TTR Customization.
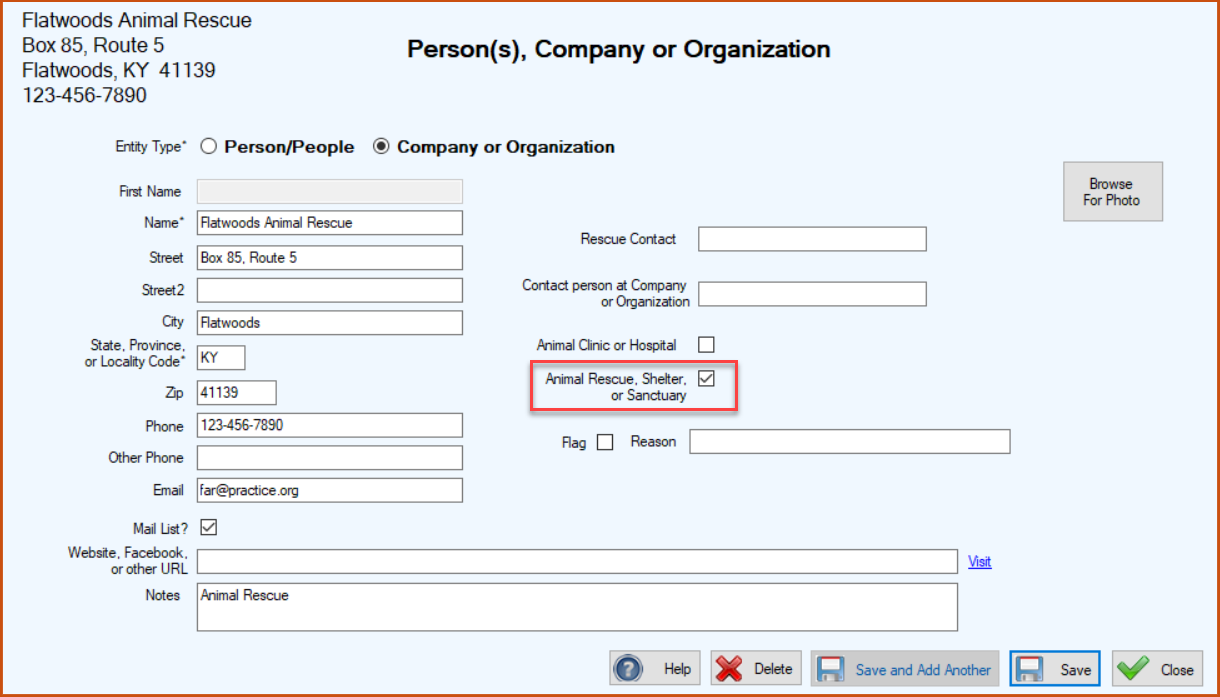
When you select “Other Rescue/Shelter/Sanctuary” or “Animal Hospital,” the phrase “Which One*” appears to the left of the PCO grid (item #14 on the image of the New Animal screen above) under the How Acquired* field, indicating you must select an organization from the grid by clicking the blank cell to the left of the name to highlight the entire row in the grid.According to your selection, TTR automatically filters the list to show only those organizations designated as Animal Rescue, Shelter, or Sanctuary or Animal Clinic or Hospital when you set up their PCO record (see screen image below).
-
If you need to add a new organization to the list, follow the instructions for Adding & Managing PCO Records.
-
If you need to add a new method of acquisition to your saved list, follow the steps for Creating & Managing Animal Acquisition Ways.
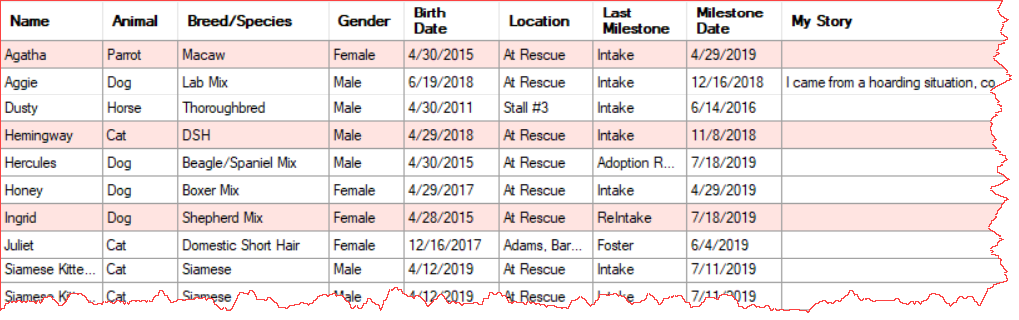
19. Flag: Click this box if you want to put the animal on a “watch list.” Be sure to enter a Reason, e.g., “This animal is not adoptable because of behavioral problems.” Adding a flag causes the record to appear in a different color in the grid on the Manage Animals screen.
Notes:
a. You can define the color for flagged items on the Preferences screen.
b. When you add a flag to an animal record, you might not see the change in row color in the grid until you close and reopen the Manage Animals screen.
22. Save the New Animal record, using one of three options:
(a) Click the Save button if you do not need to add any more new animal records. TTR saves the New Animal record and returns you to the Manage Animals screen where you can see the new animal(s) in the grid.
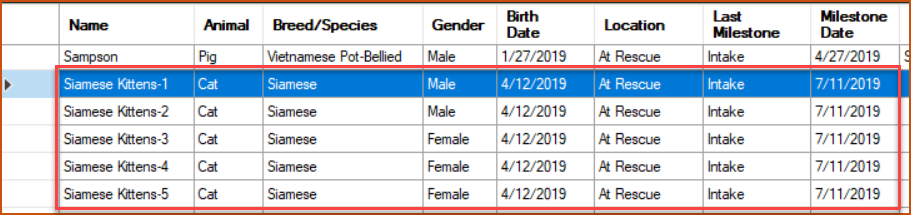
(b) Click Save and Clone if you need to add more new animals with similar information. Clicking Save and Clone saves the record you just created and brings back a refreshed New Animal screen containing all the same data so you only have to change those field that are different. This is a great feature when you take in multiple animals at the same time that have similar information.
(c) Click Save and Add Another when you take in multiple animals with very different information, e.g., different Types and Species. Clicking this button brings back a blank New Animal screen after saving the one you just entered.
1. On the TTR Home screen, click Animals under Modules or on the top navigation bar. The Manage Animals screen opens.
2. On the Manage Animals screen, double-click the cell to the immediate left of the row containing the Animal you want to edit. The Animal Details screen opens with all fields ready for editing.
3.Make your desired changes.
4.Click Save. The Animal Details screen closes and you are returned to the Manage Animals screen, where you can see the changes you just made, along with a “Modified” confirmation message at the lower left.
To Delete an Animal Record
1. On the Manage Animals screen, select the row containing the animal record you want to delete by clicking the empty cell at the farthest left of the row, highlighting the entire row.
2.Click the blue Delete button ( ) above the grid. A popup window appears to confirm you really want to delete the record. As shown in the image below, the system presents you with a list of related records that will be deleted along with the animal record, giving you the opportunity to think about what you might need to do with the associated records before you delete the animal.
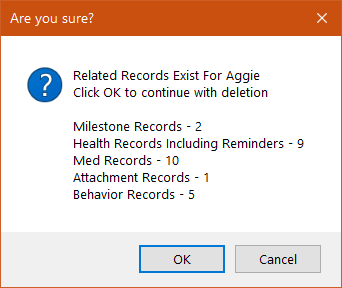
3.To complete the deletion, click OK. You are returned to the Manage Animals sceen, where the animal you deleted is gone from the center grid, and a confirmation message appears in the lower left corner.